Spring is nearly here. Let that Texas sunshine in and brighten up your apartment with a pop of color. Decor doesn’t have to be expense. And it’s not if you do-it-yourself. Check out these DIY projects for apartments.
Paint Your Own Dropcloth Rug

Add some color to your living space with a new, bright-patterned rug.
You will need:
- Dropcloth
- Sponges
- Paint
- Paint roller
- Paint brushes
- Clear sealer
Outdoor porch paint is best for this project, but indoor paint will work just as well. And you don’t need much. Sample sizes will do the trick. First, iron the drop cloth to get the wrinkles out. Next, apply two coats of base paint. Let them dry. Cut your sponges, kitchen sponges are just fine, into the shapes you want to press-on to your rug. Dip your sponge stamps in paint and apply. When the paint is dry seal it with a clear sealing coat. After the sealer is dry, decorate! Place your rug in the kitchen, living space, or any place throughout your apartment that could use some colorful cheer.
For a step by step how-to guide, visit Nellie Bellie, a happy living blog.
Give Old Furniture a Makeover

A quick coat of paint can breathe new life into old furniture. If some of your furnishings could use a makeover, this DIY is for you.
You will need:
- Paint
- Brush
- Painter’s tape
- Sandpaper
- Tack cloth
- Clear sealer
Sand your stool, this helps make the paint stick better. Use tack cloth to remove the fine dust particles. Tape off a design with your painter’s tape. Next, paint your stool with your desired colors, consider that light and dark shades provide a unique contrast. When the paint is dry, remove the tap, and spray your stool with a clear sealant. After it’s dry you have a fun piece of furniture to add to your apartment.
For more visit Hello Lidy.
Create Wall Art With Scrapbook Paper
This easy project allows you to add interest to your walls with patterned papers, some glue and painting panels. The DIY is your solution to decorating that big white wall in your apartment. And it’s affordable, too.
You will need:
- 9 12” X 12” sheets of thick scrapbook paper
- 9 12” X 12” wood painting panels
- Modge Podge, or tacky glue
- Brush
- Ruler
- Acrylic paint
First, paint the edges of your wood panels with your choice of acrylic paint color. Let the paint dry, then brush a layer of your glue onto the panel. Apply one sheet of scrapbook paper to the panel. Consider using a ruler to smooth out any wrinkles, smoothing out from the middle to the edges. Repeat! You may also consider sealing the papers with a thin layer of Modge Podge for a glossy look. When you panels are dry, lay them out on the floor into the design you like, and hang on your walls.
Searching for more inspiration? Nomadic Decorator has more DIY decor tutorials.
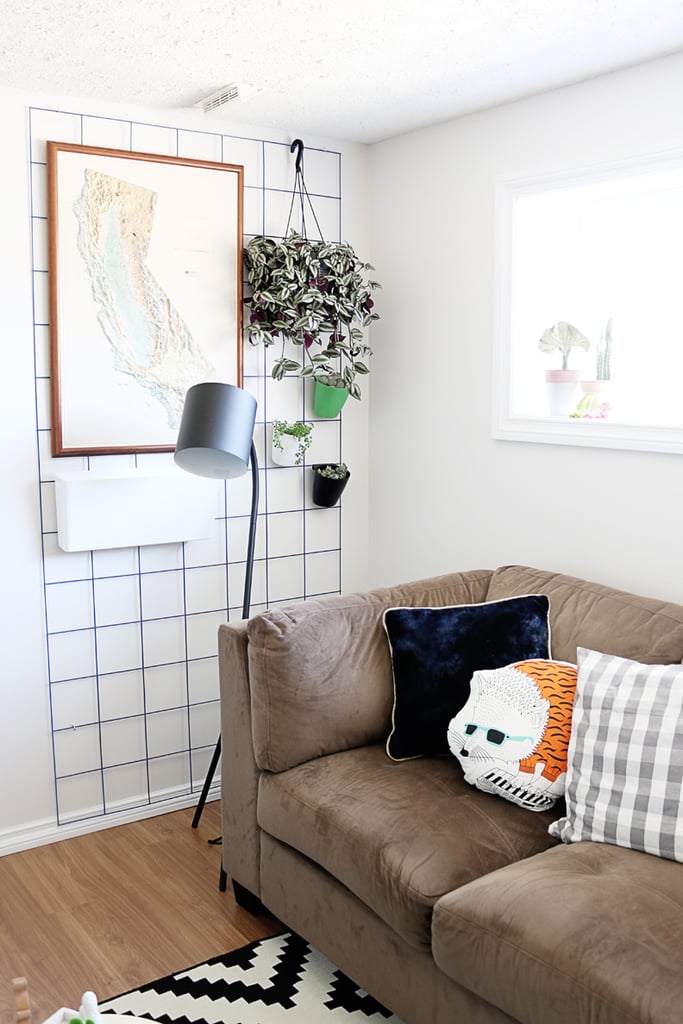
Use Caging to Create a Hangable Wall Space

Lack of hanging space? Consider this simple DIY.
You will need:
- Metal caging
- Hooks
- Paint (optional)
Great for hanging photos, plants, accessories or even clothing, this DIY can give you a chic solution for storage. Choose metal caging, which can be purchased at any home improvement store, in a size that best suits the space you are working with. You will need hooks to hang the caging. If you want to add color to the metal, it’s simple. Use bright colors of a cheery look or metals like gold for a modern, sophisticated feel.
PopSugar has more DIY projects for apartments.
Make Shelves From Fruit Crates
Searching for a storage solution that’s both cheap and chic? Look no further than this practical DIY.
You will need:
- Fruit crates
- Small nails
- Hammer
- Sandpaper
- Paint (optional)
Start with the crates. If they need a little refurbing, give them a good rub-down with sandpaper to clean them up and make the surfaces smooth. Stack your crates vertically, allowing the open face of each to face towards you, and nail together using small nails. The crate shelf can be used for books or other goods. And, if you want to paint your new shelving units, it’s your canvas — go for it!
For more on this DIY check out Apartment Therapy.


